
If you fall into cold water, stay calm and control your breath—cover your mouth, tilt your head back, force slow pursed‑lip exhales for about a minute—keep your clothes and lifejacket on to float and trap air, get horizontal with short steady kicks toward the nearest safe edge if you can reach it in ten minutes, otherwise pull knees to chest in the H.E.L.P. or form a tight huddle with others to conserve heat, signal for help and use ice picks or roll away once on the shelf, more practical steps follow.
Some Key Takeaways
- Control your breathing immediately: force slow exhalations, tilt head back, and count breaths for the first minute to prevent gasping and inhaling water.
- Keep your lifejacket and clothing on to maximize buoyancy and insulation; do not remove layers in cold water.
- Use the 1‑10‑1 rule: one minute to control breathing, ten minutes of purposeful movement, about one hour before severe hypothermia.
- Adopt H.E.L.P. or huddle with others—knees to chest, arms tight, chests together—to conserve core heat and reduce heat loss.
- If possible, get horizontal, kick strongly to reach a stable surface, then roll onto the ice or craft and slide away before standing.
What to Do Immediately After Falling In: The 1‑10‑1 Rule and First Priorities
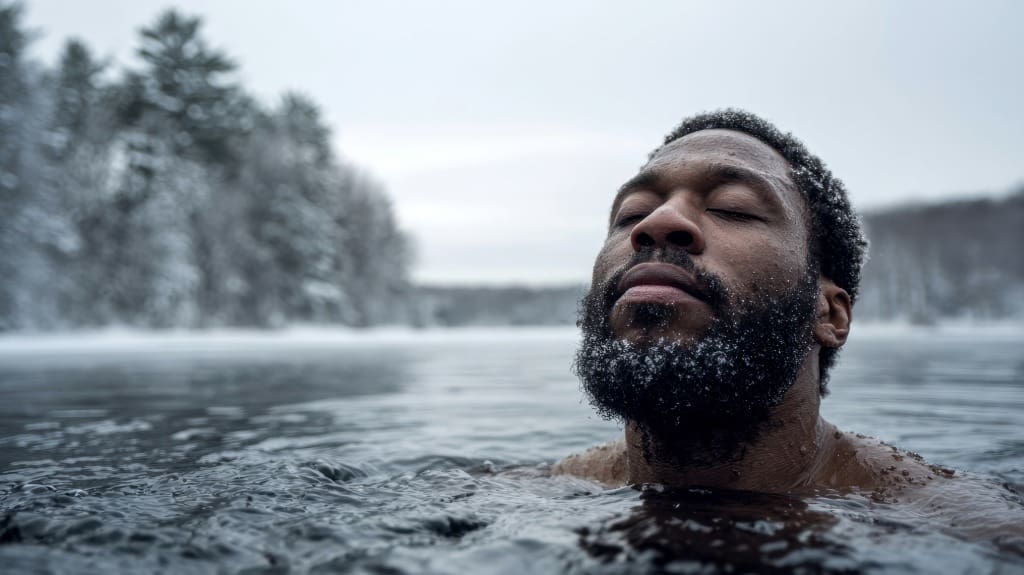
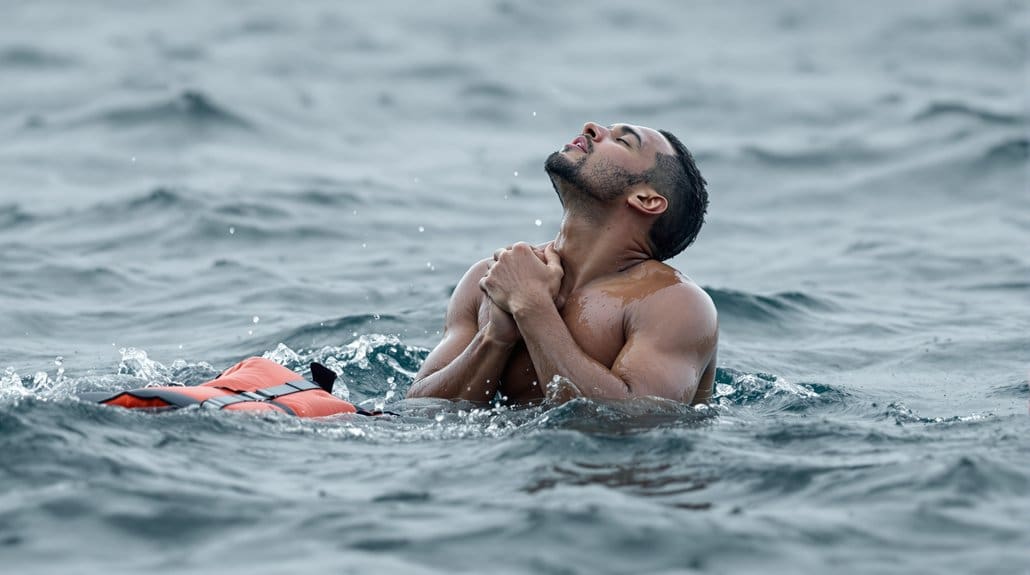
If you suddenly find yourself in cold water, stay calm and focus on the 1‑10‑1 rule: you’ve got about one minute to get your breathing under control, roughly ten minutes of effective movement before your limbs start to fail, and close to an hour before hypothermia is likely to knock you out, so your first moves matter. In cold-water immersion, fight the gasp by exhaling through pursed lips, take slow controlled breaths, and keep a lifejacket on or put one on if you can, because flotation helps steady breathing and saves energy. If you have a PFD, assume the HELP posture alone or huddle with others to keep heat, and if you can reach safety within ten minutes, kick horizontally, climb aboard, roll away, and get dry fast. Consider carrying a compact hypothermia kit and other essential cold-water gear for paddlers, like a spray skirt and drysuit, to improve your chances of self-rescue and recovery by maintaining warmth and flotation hypothermia kit.
How to Control Your Breathing in the First Minute (Practical Steps)
When you hit cold water, get your mouth and nose covered with a cupped or gloved hand right away to stop a cold-water gasp from pulling in water, then tilt your head back and chin up while you float so your airway stays clear and breathing's easier. Start taking slow, full breaths and blow out through pursed lips like you’re fogging a mirror, count each breath or repeat a calm phrase to steady the rhythm, and don’t try to sprint—you’ve got about a minute to settle this. If you feel panic rising, keep the counts slow and steady, focus on exhaling more than inhaling at first, and remember that controlled breaths will buy you the time and clear thinking to reach flotation or signal for help. Gear up with proper flotation and a weather radio to improve your chances on the water.
Control The Initial Gasp
Because that first gulp of cold air can lock your chest and make you panic, start by forcing a slow, controlled exhale through pursed lips the instant you hit the water, so you stop the involuntary gasp and the fast, shallow breathing that pulls water into your lungs; keep your head tilted back and your chest up, take slow diaphragmatic breaths — inhale gently through your nose, exhale through pursed lips — and focus on full, steady breaths for the next minute, the critical window where cold shock peaks. You want freedom to move, so press a gloved hand or sleeve to your face if you can, stay calm, count breaths, settle heart rate, then adopt a float posture and avoid useless thrashing until you’ve regained control. Wearing appropriate cold-water immersion gear like a drysuit or immersion suit greatly increases your chances of self-rescue and survival.
Slow, Measured Exhalations
Start by making your exhale deliberate and slow, and keep at it for that first minute so your body stops gasping and your head clears; press your lips together as if you’re going to blow through a small straw, breathe out steadily through that narrow opening, then let your next inhale be gentle and low in the belly, not high and panicked. In cold-water shock your reflex is to gulp air and hyperventilate, so you’ll force calm by using pursed-lip exhalations, aiming for about six to ten full breaths a minute, and you’ll feel your heart rate ease. If you can, support your upper body with a float or by holding the craft so you can focus on this breathing, and practice the one-minute routine on land until it becomes automatic. Proper personal flotation and wilderness first aid supplies can make self-rescue more effective, so always carry essential safety gear when you head out.
Stabilize Breathing Rhythm
You’ve already practiced the slow, pursed-lip exhale, so now lock that into a simple routine you can use in the first minute: immediately press your lips together like you’re about to blow through a small straw, breathe out slowly to stop the initial gasp, then pull a low, belly breath in with your shoulders relaxed, and repeat at about six to ten breaths a minute while you steady yourself; keep your chin slightly tucked, hold onto the craft or keep your lifejacket snug so you don’t waste energy, and if cold spray is hitting your face cover your mouth and nose with a gloved hand or sleeve to avoid inhaling water during the reflex gasp. Use the 1-10-1 rule, count or say a short phrase to steady rhythm, diaphragmatic breaths calm heart rate, and this habit will help prevent the involuntary gasp on cold-water entry. Also make sure you always carry and know how to use essential safety gear like a pealess whistle to signal for help from nearby boats and shore—pealess whistle are compact, reliable, and required by many local regulations.
Why Keeping Your Clothes and Lifejacket On Buys Time
Almost always, keeping your clothes and your lifejacket on after you hit cold water buys you the most time and the best chance of staying conscious until help arrives, because soaked clothes trap pockets of air that help you float, slow how fast your body cools, and make it far easier to conserve energy than stripping off and trying to swim. You want freedom on the water, so wear a lifejacket before you go, check its fit and buckles, and stash a whistle or light where you can reach it, because once cold shock hits you won't be able to dress yourself. Stay still, float, and make a plan to signal or move to shelter when you can, huddle if others are with you, and keep breathing steady. Choosing a proper Type III PFD can improve flotation and comfort during cold-water self-rescue.
Quick Body Positioning to Conserve Heat: The H.E.L.P. Position
If you hit cold water, control your breathing first — take slow, steady breaths until the initial shock eases — then pull your knees to your chest and wrap your arms tight around them so your lifejacket holds you in the H.E.L.P. position, which cuts the amount of exposed skin and keeps the warmth around your core where it matters most. You’ll want to stay upright, keep your chin up, and tuck your head slightly, because reducing surface area and limiting blood flow to limbs buys time, often toward that vital hour mark before severe hypothermia sets in. If you can, hoist yourself partly onto wreckage or a floating object to lift limbs from the water, stay calm, signal for help, and conserve every calorie of warmth. Wearing appropriate safety gear greatly improves your chances of staying afloat and retaining heat.
Group Survival: How to Form and Hold the Huddle Position
When you get everyone together, make sure lifejackets are straight and snug so buoyancy sits high on the chest, then press chests together and wrap arms over shoulders to lock a tight, compact huddle that keeps heads up and airways clear. Keep legs and arms interlocked to share the trapped warm water and slow cooling, rotate colder or weaker people into the center while the stronger folks face outward to watch for hazards and signal rescuers, and if jackets aren’t available, use close contact back-to-back or chest-to-chest holds and keep talking to coordinate breathing. Stay as still as you can to save energy and limit cold water flow, watch for slipping straps or gaps, and if someone slips or gets too cold, make a calm, quick swap so the group stays stable. Also make sure everyone has appropriate flotation and rescue gear on hand, including sturdy rescue slings, before you go out.
Life Jacket Alignment
Frequently, the simplest adjustment makes the biggest difference: with your life jacket snug and all straps fastened, turn to face the others, press your chest into the group, loop an arm over a neighbor’s shoulder and lock legs together to cut down exposed surface area, because holding that close, upright formation traps shared warmth and slows cold water from pulling heat away. Check each jacket for a firm fit, adjust crotch and waist straps so jackets don’t ride up, and make sure collars support heads, because a loose PFD wastes its insulating power. Stay calm, pick a leader to call cadence and direction, speak up if someone’s slipping or straps loosen, and keep movements slow so you save energy and keep the group tight.
Body Contact Technique
Slide in close and press your chest to the group, wrapping an arm over a neighbor’s shoulder so everyone’s facing inward and you cut down exposed surface area, because that tight contact traps warmth and shares buoyancy from your lifejackets. You form a huddle by keeping chests pressed, arms over shoulders, and legs intertwined or tucked together beneath the group, which steadies you and limits lower-body heat loss while lifejackets keep air trapped for float and easier breathing. Stay upright but slightly vertical, stay as still as possible, and speak calmly to set small adjustments or a gentle rotation so gaps don’t open and someone drift off, because motion wastes heat and cohesion preserves flotation and survival, simple, steady teamwork you’ll thank yourself for.
Heat Retention Strategy
Keeping your chest pressed to others and locking arms over shoulders is your first move for holding heat and staying afloat, so move close, tuck legs together, and make a tight circle that cuts down exposed skin and shares buoyancy from everyone’s lifejackets. You’ll form a huddle, keep upright, and keep heads above water, because that limits heat loss from chest and neck, so stay vertical, still, and steady. Tighten the circle and stop unnecessary movement—every extra kick or flail steals warmth—while you watch each other for shivering or panic. Use calm voice contact and slow, controlled breaths to settle people, share any dry clothes or blankets in the middle, and hold position until rescue or you can move together to safety.
Making a Plan Fast: Assess Distance, Direction, and Escape Options
When you break through or see someone else in trouble, stop and take a quick, calm survey—your first job is to figure distance to shore or solid ice, which way you came from (that route often has stronger ice), and your nearest escape options so you don’t waste energy heading the wrong way. You’ll want to turn toward the direction you came from if it’s reasonable, check for visible shelves, thicker ice, or floating debris to haul on, and remember the 1-10-1 rule: one minute to control breathing, about ten effective minutes to move, an hour before severe hypothermia. Keep hands on unbroken ice, kick hard to get horizontal, use short choppy kicks to slide up, keep clothing and tools ready, and plan to roll away once you’re out.
Self‑Rescue Swim Techniques When You Can Still Use Your Limbs
If you can still move your arms and legs, act fast but stay calm: control your breathing in that first minute, tuck your chin, and use short, steady strokes—think gentle breaststroke or a sidestroke—so you don’t waste energy or heat, and keep your movements compact to stay horizontal and reduce drag. You’ll have about ten minutes of useful limb function, so use clothing buoyancy, don’t strip off layers, and swim with controlled kicks and short pulls to a nearby object or shore, keeping your head low, breathing steady, and energy conserved; if you have a PFD, tuck into HELP or huddle, avoid frantic splashing, and remember stay calm, aim for deliberate progress, and accept slow, steady movement wins.
Using Nearby Flotation or a Capsized Boat to Get Out of the Water
Your jacket’s buoyancy and whatever's floating nearby can buy you time, so grab onto a capsized boat, buoy, or chunk of debris and keep your breathing steady while you work—don’t thrash, paddle with short, controlled kicks, and aim to get your elbows over the edge so you can kick and scoot your hips up. Stay relaxed, keep the 1‑10‑1 breathing rule in mind, and use trapped air in clothing and your lifejacket to stay buoyant while you move horizontally toward the nearest support, then try to hoist yourself partly aboard, elbows on the rim, kicking to push hips up. If it’s large enough, turn it for a platform or lie flat, adopt H.E.L.P., huddle if you’re with others, signal for help, and avoid unnecessary movement until rescue.
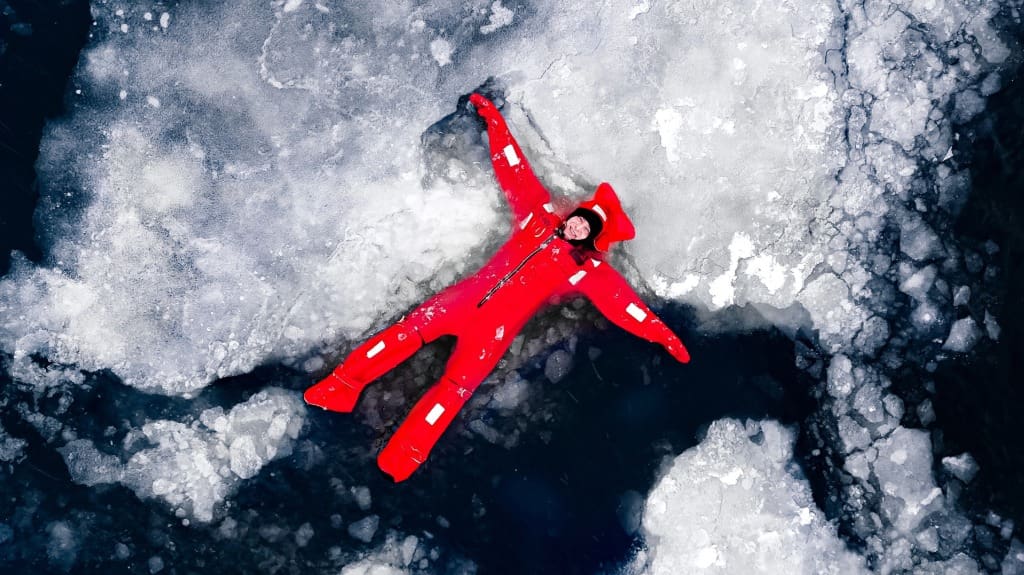
Ice‑Exit Tactics: Using Edges, Kicks, Ice Picks, and Rolling Away
Even though it'll feel shocking, turn toward the last place you knew the ice was good and keep your head low so you can get horizontal and swim onto the shelf, kicking hard with short, rapid strokes while using your arms to pull and slide yourself forward—aim to get your chest up so you can use your elbows to lever rather than relying on a full-arm pull, because that saves energy and helps you avoid tearing fragile edges. If you carry ice picks, drive them into the ice with short, choppy motions, pull your hands forward while you kick, and slide your hips up, keeping momentum and breathing steady; once your chest clears, stay flat and roll away from the hole until you reach thicker ice or solid ground, don’t stand up immediately.
Once Out: Immediate Steps to Reduce Post‑Rescue Collapse Risk
Once you’re out, keep the person horizontal and still if you can, strip off wet clothes only when it’s safe and cover them with dry blankets or insulated layers to stop conductive heat loss. Watch closely for signs of post-rescue collapse—sudden dizziness, fainting, weak pulse or shallow breathing—and use passive warming like blankets and warm packs at the neck, armpits or groin rather than hot baths, while getting high-flow oxygen and medical help ready if you’re trained. Even if they seem fine, stay with them, monitor their breathing and pulse, avoid rapid core reheating, and get professional care right away because bad heart rhythms or re-warming shock can show up hours later.
Remove Wet Clothing
Get out of the wet clothes as soon as it's safe, because soaked garments pull heat from your body fast and can help trigger the dangerous re‑cooling that leads to post‑rescue collapse; if cutting them off is safer than stripping them, have someone gently cut seams and roll sleeves while keeping movement minimal to avoid stressing a cold heart. After you're free of wet layers, remove wet clothing immediately when you can, but do it gently if you or a partner look pale, slow, or confused, since rough handling can set off arrhythmia; swap in dry insulating layers—wool or synthetic first for the core, cover your head—use blankets or a sleeping bag, shelter from wind, and get medical help fast, because delayed cardiac arrest is a real risk even after you feel better.
Gentle Rewarming Measures
When you’ve hauled someone out and got them somewhere sheltered, keep them lying flat and still while you work, because sudden movement can send a rush of cold blood to the heart and spark a collapse; strip away wet clothes as soon as it’s safe—cut seams if that’s easier—then cover the head and core first with dry wool or synthetic layers, a sleeping bag, and a windproof shell to trap heat without forcing circulation from the limbs. You’ll want to remove wet clothing fast, but be calm and efficient, replace it with dry insulation, shield from wind, and avoid rubbing or vigorous limb warming, which can drive cold blood inward; offer warm, sweet sips only if they’re fully awake and can swallow, then get professional care.
Immediate Medical Monitoring
You’ll want to stay close and keep watching the person steadily, because the minutes after you’ve pulled them out are the most risky: check their airway, breathing and pulse without delay, watch for shallow or slowed breathing that shivering can hide, and be ready to start CPR if they become unresponsive. Keep them horizontal, remove wet clothes and replace with dry layers or blankets, and monitor airway and breathing continuously, since cold can slow respiration and mask trouble. Rewarm gradually, covering head and trunk first, use warm (not hot) packs at armpits and groin if you have them, avoid sudden standing or limb heating, and seek urgent medical care, because arrhythmias, pulmonary edema, or post‑rescue collapse can show up later.
What Equipment to Carry and Practice for Cold‑Water Incidents
Think through your kit the way you’d pack for a short, cold trip—every item should earn its place because in cold water seconds count, and the right gear gives you time to act; wear a USCG‑approved life jacket or float coat every time you’re near cold water so you have flotation to keep your airway clear and use HELP or huddle positions to save heat, carry ice picks (hand spikes) and a pea‑less whistle on the outside of your clothing where you can grab and blow them even if you’re wet or partly submerged, and use a dry suit or anti‑exposure suit for offshore or known cold work (at minimum a wetsuit plus your PFD) because those garments trap insulating air and add buoyancy to lengthen survival time. Practice self‑rescue moves in calm conditions, rehearse the kick‑to‑horizontal and roll away techniques until reflex, keep a small thermal blanket, waterproof bag with spare insulating layers, and a signaling device like a flare or VHF radio within reach, and check gear before every outing so your freedom to roam stays safe.
Common Mistakes to Avoid and Quick Troubleshooting During Rescue Attempts
If you stay calm and focus on a few simple rules, you'll avoid the mistakes that make cold‑water rescues go wrong, so first slow your breathing—use a long, pursed‑lip exhale to stop the gasp reflex and keep water out of your lungs—then secure flotation and stop thrashing; panicking and flailing burns energy, raises your chance of inhaling water, and wastes the limited time your body has before limbs weaken. Remain calm, keep your lifejacket on, and resist stripping wet clothes unless a rescuer tells you otherwise, since soaked garments trap insulating air and add buoyancy; don't try a strong swim to shore, float in HELP or huddle positions, and if you get out, roll away from thin ice, rewarm slowly, and seek medical care.
Some Questions Answered
What Is the Best Way to Help Survive in Cold Water?
You survive best by controlling your breathing, getting afloat, and using thermal shielding like a lifejacket to preserve heat, so grab and wear a PFD right away, keep calm, and kick to get horizontal toward safety. If you can’t self-rescue, stay with your boat or a float, huddle with others to share warmth, avoid swimming that burns heat, and after rescue remove wet clothes, rewarm gradually, and seek medical care.
What Are Some Self-Rescue Techniques?
You control breathing first, slow pursed-lip breaths, then float to buy time, using a lifejacket if you’ve got one, because Floating Breathing together keeps you calm and afloat. Try the HELP position to save heat, keep clothes on for buoyancy, and move toward where ice looked solid or a boat, kicking steadily, using arms to pull up when you can; carry a whistle, ice picks, and a small rescue rope for quick self-rescue.
What Is the 1 10 1 Rule in Cold Water?
The 1 10 1 Rule means you’ve got about 1 minute to stop gasping and control breathing, roughly 10 minutes of useful movement to swim or get to flotation, and about 1 hour before hypothermia risks unconsciousness, so act fast. Strap on a lifejacket, relax and control breaths, move toward safe flotation or shore while you can, use HELP or huddle to save heat, and seek rapid rewarming and medical help after rescue.
What Are Some Survival Techniques in Water?
You start by using Floating Awareness: stay calm, get on your back or tuck into the HELP position in a lifejacket, and control breathing to stop gasping, because that buys you the minute to think and minutes to move. Look for nearby craft, shore, or ice you came from, signal and kick efficiently, keep your pack or whistle handy, and if you’re with others, huddle chest‑to‑chest to share warmth.


