
Pick sheltered bays, quiet inlets, calm lake arms, or slow river backchannels in cities, start at protected launches or marina guest docks, and plan short 1–5 mile routes with frequent exit points; wear a drysuit or warm layers, a Coast Guard‑approved PFD, neoprene booties and gloves, carry a whistle, phone/VHF in a drybag, paddle float and bilge pump, check wind, tides and river gauges, tell someone your plan, and aim for daylight trips near a warm stop—keep going to get route examples and gear checks.
Some Key Takeaways
- Choose protected harbors, quiet coves, and sheltered river backchannels to avoid wind chop and heavy tidal currents.
- Start with short 1–5 mile routes near frequent landing options and visible exits for quick sheltering.
- Pick launches with easy ramps or marina docks, nearby parking or transit access, and confirmed seasonal availability.
- Wear a fitted drysuit, layered insulating base, neoprene boots/gloves, and carry a Coast Guard–approved PFD.
- Bring basic rescue gear (throw bag, paddle float, bilge pump), file a float plan, and check wind, tide, and water-quality forecasts.
Where to Paddle in Winter: Pick Protected Bays, Lakes, and Slow Rivers
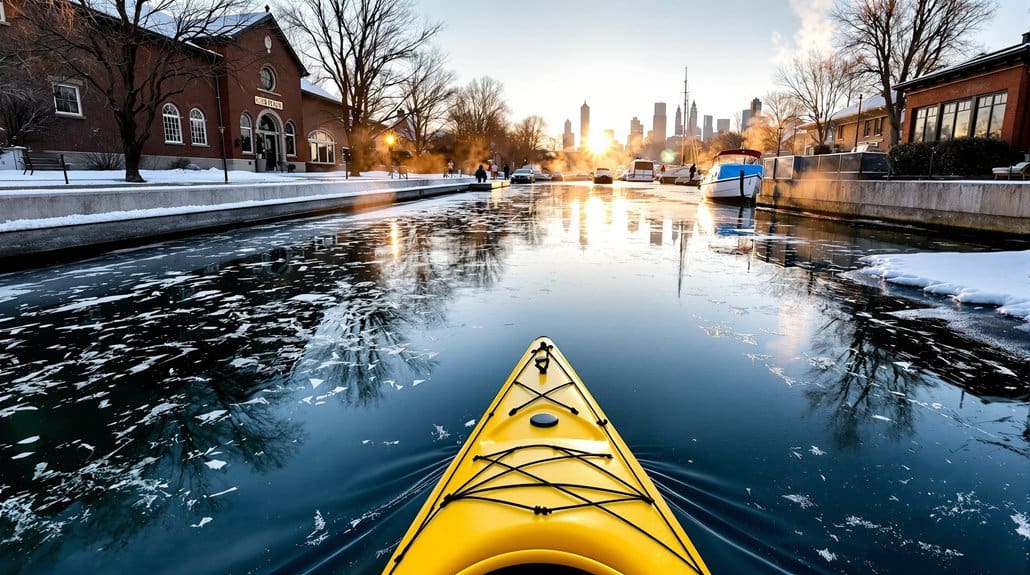
When you’re planning a winter paddle, pick places that shelter you from wind and swell, like protected bays, quiet inlets, calm lakes, or slow river backchannels where currents stay gentle and exits are easy; aim for spots such as Crane Cove in San Francisco, sheltered pockets of Seattle’s Elliott Bay, quiet coves on Lake Erie near Cleveland, Austin’s Lady Bird Lake, Benson or Trillium Lake in Oregon, or the calmer arms of the Potomac and Pittsburgh’s river confluences so you won’t fight wind chop or big tidal pushes. You’ll want protected bays and sheltered inlets where launch and exit points stay easy, calm lakes with predictable wind, and slow-moving rivers that lower current risk, check urban runoff and water quality alerts, plan short put-ins near warm spots, know nearby rentals and rescue options, and keep exits close so you can peel off quickly if weather or water turns. Consider bringing lightweight stability gear like a para-anchor for added security in calm spots para-anchor devices to help steady your kayak in wind or current.
Dress and Safety Gear for Chilly City Waters
Dressing right for chilly city waters starts with assuming you'll get wet, so pick gear that keeps core warmth and hands working even if you take an unexpected swim: wear a properly fitted drysuit with sealed wrist and neck gaskets rather than relying on layers alone, layer a moisture‑wicking base, an insulating mid‑layer like synthetic or wool, and carry a windproof shell for shore breaks, and choose gloves rated for near‑freezing temps so you can still paddle and manage rescue gear. Add a Coast Guard–approved PFD (personal flotation device) that fits over bulk, carry waterproof gloves, a helmet where rocks or fast runs exist, and pack cold‑water rescue tools — throw bag, paddle float, bilge pump — practice rescues, monitor hypothermia prevention, and paddle with a partner. For longer urban excursions, consider bringing dedicated kayak accessories like inflatable floatation bags to improve boat stability and safety in crowded or confined waterways; these are useful when transporting gear or in the event of swamping, and their use is recommended for added security in city paddling environments—see floatation bags.
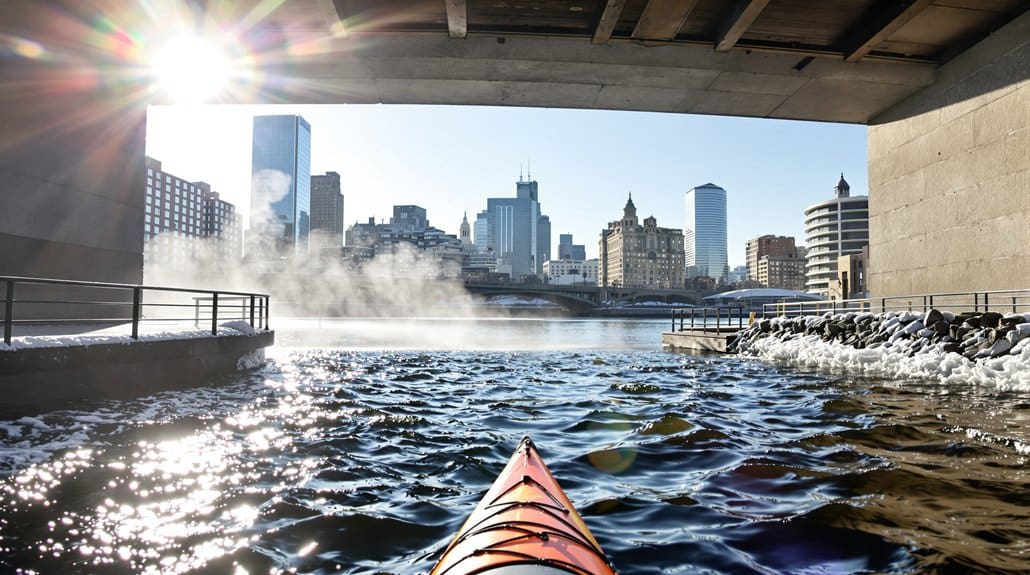
How to Read Winter Conditions: Ice, Current, Wind, and Boat Traffic
You’ve got your drysuit and rescue gear sorted, now start reading the water before you shove off: scan the shoreline for ice that looks thin, honeycombed, or patchy—if you see less than a couple inches where it’s forming, or open seams near bridges and outflows, treat nearby water as unsafe because currents often keep those areas open. Check ice formation, watch river current speeds, and note sluice points where fast flow can shred edges, and don’t paddle in narrow funnels or below dam releases if currents exceed a few knots. Read winds—sustained gusts change chop and cold exposure, increasing hypothermia risk. Watch boat traffic corridors for wakes that punch holes, monitor safety alerts, file a float plan, and pick your launch when light, planned, and conservative for launching a kayak. Also make sure your kit includes essential river gear like a reliable river level gauge so you can monitor conditions before and during your trip.
Easy Launches and Quick Exits: Finding Ramps, Piers, and Shorelines
When you're scouting launch ramps and nearby dock or shore access, look for low-profile concrete ramps, protected piers, and marina guest docks that make getting on and off easy, and check that parking or transit is close so you don't haul gear blocks. Bring a short paddle float or small folding cart, wear layers you can get out of quickly, and call the city or an outfitter ahead to confirm seasonal dock access and water-quality closures so you don't get shut out. Start with calm, sheltered spots—think Crane Cove or a marina dock—so you can practice quick exits, test your gear, and leave with time to spare if conditions change. Consider checking local launch guides for perfect launch sites to find vetted ramps and shore access near urban waterways.
Launch Ramps Nearby
Cold-weather launches can be easy if you pick the right spot, so start by looking for municipal ramps, public piers, or shoreline access that give you a quick put-in and a quick exit—places with marked boat ramps, parking, and ADA access like Lady Bird Lake or Crane Cove are gold, and riverfront parks in Georgetown, on the Chicago Riverwalk, or at Cleveland’s North Coast Harbor often have stair-free shorelines that make getting a kayak or SUP on the water simple. You’ll want to scout park launch facilities and marina guest docks ahead of time, check tide and current charts for coastal ramps, confirm seasonal closures or advisories, bring a throw bag and dry layers, and use rental outfitters if you want local tips. Consider bringing an all-terrain cart to make launches and exits easier, especially on uneven or long shorelines with gear transport.
Dock And Shore Access
Start by picking a spot that makes getting on and off the water fast and predictable, so look for public ramps, concrete launch pads, piers with easy cleats, or sandy shorelines near parking or transit, places like Georgetown’s Canal Basin, Crane Cove, or Cleveland’s North Coast Harbor that give you a short carry and a clear exit route. You’ll want urban waterways with visible boat ramps or marinas, riverfront parks with low banks or steps, and protected coves that cut wind and waves, so you can stage gear, scout currents, and plan quick exits. Bring warm layers, a leash and PFD, waterproof bag for phone and keys, check tide and ice, and pick sites with staff or easy road access for a safe, free paddle. Consider installing wall-mount racks to store and prep your kayak near home for quicker launches and safer gear staging wall-mount racks.
Best Warm‑Weather Winter Cities to Try First
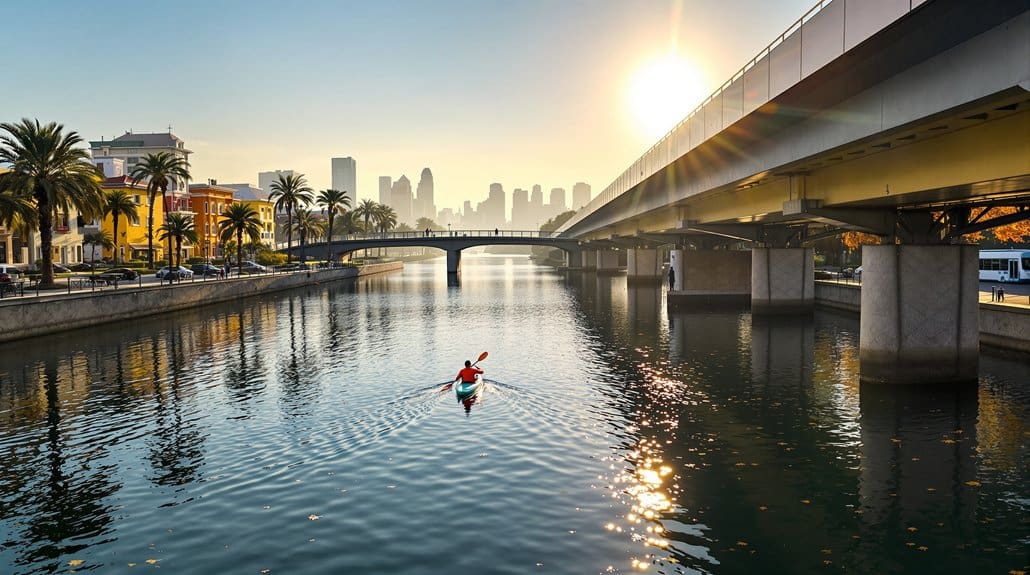
Think of this as a warm-weather starter map for urban paddling, a handful of cities where you can get on the water without freezing gear, scope out calm lines, and build confidence before moving to rougher winter spots. You’ll find mild winter paddling in St. Augustine, where the Intracoastal Waterway runs calm by Castillo de San Marcos and the lighthouse, so start with short laps, wear layers, and scout current at low tide. Try Austin’s Lady Bird Lake for easy winter SUP cardio, rent a board, practice turns near shore. Crane Cove in San Francisco gives a protected launch and seal sightings, bring a splash jacket. If you’re ready, watch tides and traffic on Puget Sound, keep VHF or phone handy. Wilderness Systems offers a range of kayaks suited to urban and coastal paddling for different skill levels, so consider a recreational kayak when choosing gear.
Top Urban Launches: Crane Cove, Lady Bird Lake, and Potomac Access Points
If you’ve been paddling in milder winter spots and want to move toward busier city launches, pick three you can learn a lot from—Crane Cove in San Francisco, Lady Bird Lake in Austin, and the Potomac near Georgetown—because each gives different practice: Crane Cove is protected water and skyline views so you can work on strokes and re-entries without big chop, Lady Bird Lake is long, calm, and great for SUP cardio and boat control near shore, and the Potomac gives you currents, traffic awareness, and scenic navigation past islands. You’ll treat each launch like training: check water quality and local advisories, wear layered thermal gear or a drysuit, bring a leash for SUP boarding, a PFD, pump, and spare paddle, and scope nearby kayak rentals and post-paddle spots so you can focus on skills, not logistics. Consider bringing essential gear like transport covers to protect your kayak and equipment during travel and storage.
Rentals, Guided Tours, and Class Options for Cold‑Season Paddling
When you’re paddling in winter, start by checking rentals for warm kits—ask if they rent drysuits, insulated sit‑on‑tops or rigid SUPs, and whether sprayskirts and PFDs come with the boat, because that gear will keep you safe and comfortable. Look for guided cold‑water skills sessions that include group rescue practice and instructor certifications, and confirm the provider’s emergency plan, group size limits, and recent tidal or water‑quality notes before you book. If you’re new to offseason paddling, sign up for a winter clinic or intro class on rolling, flatwater rescue, or tidal navigation, which often run in smaller groups with more personal instruction and less crowded launch times.
Gear Rental And Warm Kits
You'll find that renting a winter-ready kit and joining a guided session is the fastest, safest way to get out paddling in cold months, so start by asking the outfitter what they include and what they require: do they rent drysuits or at least neoprene layers, insulated paddling jackets, thermal gloves and neoprene booties, and do they provide committed cold‑water safety gear like PFDs, spray skirts, helmets, throw bags and a rescue tow? Choose rental outfitters that offer cold-water safety kits and short clinics, so you get a warm kit that works, heated changing rooms that cut exposure, and clear policies on water quality and cancellations. Bring wool or synthetic layers, confirm guide ratios and route limits, and ask about basic cold‑water rescue practice before you go solo.
Guided Cold‑Water Skills
Now that you've thought through renting a warm kit, the next step is to sign up for a guided cold‑water skills session so you learn how to stay safe and get comfortable fast. Pick outfitters that run guided sessions in Nov–Mar, ask if drysuit rentals or discounts are available, and check instructor ratios so you get hands‑on time, because you’ll practice wet‑exit, re‑entry, and self‑rescue skills with a pro. Confirm guides carry tow lines, VHF or waterproof phone, and a marine first‑aid kit, and verify CPR/first aid and rescue certifications. Bring insulated paddle gloves and neoprene booties if they’re offered, limit outings to 60–90 minutes in near‑freezing water, and ask about cancellation policies for tide, wind, and traffic.
Winter Classes And Clinics
You’ll find that signing up for a winter class or clinic is the fastest way to get safe and confident on cold water, so look for programs that mix classroom time with on‑water practice, have certified instructors, and offer or rent drysuits or wetsuits so you don’t have to buy gear right away. Choose winter clinics that teach cold‑weather safety, hypothermia signs, layered insulation, and self‑rescue, and ask about PFD requirements and instructor ratios before you book, because hands‑on time matters. If you paddle tidal bays, pick sessions covering tidal navigation, currents, and traffic, while calmer venues focus on stroke and rescue drills. Check water‑quality advisories, cancellation policies, and gear availability, then show up ready to learn and reclaim freedom on the water.
Wildlife, Landmarks, and Quiet Routes Worth Photographing
Start by picking a launch that sets you up for easy, photo-ready stretches of water, because in winter the best shots come from calm, predictable places where you can focus on framing instead of fighting current. Choose a protected launch—Crane Cove in San Francisco or quieter Potomac slips near Theodore Roosevelt Island—so you can approach harbor seals or wintering waterfowl like bufflehead and mergansers without spooking them, keep distance, and use a long lens or steady paddle strokes. Look for skyline reflections in Pittsburgh or Seattle at dawn, pack layered clothes, a dry bag for gear, a headlamp for night paddles in NYC, and respect quiet routes and local traffic rules, paddle slowly, and savor the freedom to compose each shot.
Simple Winter Routes for SUP and Recreational Kayaks
Start with protected harbor routes, where you'll find calmer water, marked launch points, and easy exits—think a sheltered marina or Crane Cove—so you can practice strokes and turns without fighting big wakes. For a bit more motion but still safe, pick short calm river loops or 1–3 mile out‑and‑backs with clear public access, check wind, tides, and water quality first, and wear a drysuit or wetsuit plus a PFD so you can stay warm and get off quickly if conditions shift. Tell someone your plan, stick to daylight hours, carry a charged phone in a waterproof case and a basic rescue kit, and aim for routes with frequent landing options so you can change course the moment weather or traffic looks sketchy.
Protected Harbor Routes
When you’re setting out for a winter paddle in the city, pick a launch that keeps you out of open fetch and heavy traffic, like Crane Cove in San Francisco, an inlet off Elliott Bay in Seattle, or the Georgetown stretch of the Potomac, because those sheltered harbors and bays cut down on wind, waves, and passing ferries and make it easier to bail if conditions change. Choose protected bays and harbors with sheltered launch spots and easy shore access, like Mission Creek or North Coast Harbor Marina, check tidal windows and local advisories so currents don’t surprise you, favor river options like the Chicago River when lakes are angry, wear solid cold-water protection, carry a VHF or waterproof phone, and paddle with a buddy.
Calm River Loops
For easy winter paddles, pick a calm river loop that keeps you near shore, near exits, and away from big open water—so you’ve got places to bail if the wind or traffic picks up—like the Georgetown–Roosevelt Island circuit in D.C., Pittsburgh’s Point State Park run, or Chicago’s North Branch downtown loop. You’ll want urban paddling routes that feel safe but free, so start by checking wind and current, note launch spots and rental shops near Georgetown Potomac or Point State Park, and skirt ferry lanes on Elliott Bay, Lady Bird Lake, or the Chicago River. Carry a leash or skirt, PFD, spare layer, phone in a dry bag, and a small throw rope, plan a 3–5 mile route, and stick close to shore, exits, and friendly people.
Post‑Paddle Warm‑Up: Transit, Food, and Gear Care
Wringing out the day’s chill is as much about quick choices as it is about warm drinks, so after you pull ashore look for a nearby indoor waiting spot or ferry terminal where you can get out of the wind within 15–30 minutes, unzip and ventilate wet layers, and start drying the most important pieces — a spare dry base layer and instant hand warmers go a long way — while you grab a hot soup or coffee just a short walk from many put‑ins. After that, think post-paddle transit: pack damp kit in leak‑proof bags, keep boots and helmet separate, and check public transit rules so you don’t slow others down, then rinse salt off boats and paddles, hang gear to dry within 24–48 hours, and enjoy your warm‑up.
Some Questions Answered
Can I Paddle Alone in Winter, or Should I Always Go With a Partner?
You can, but you shouldn’t rush into solo winter paddling without a careful risk assessment and honest sense of your skill level, because cold water gear matters and mistakes escalate fast. Check local regulations, file an emergency plan with someone, carry communication devices and plan multiple exit strategies, practice self-rescue in warm conditions, and pick shorter trips near help, so you get freedom while staying safe, confident, and ready.
How Do I Transport a Kayak or SUP on a Roof in Icy Conditions?
You secure your kayak or SUP by fitting sturdy roof racks, using ice guards to keep frozen buildup off metal, and placing foam blocks or traction pads under the hull so it won’t slip, then grab a loading buddy if you can, tighten with heated straps or good tie downs, do a careful tie downs inspection, and recheck straps after a short drive, keeping a shovel and gloves handy for quick de-icing and safe adjustments.
Are There Special Permits or City Rules for Winter Paddling in Downtown Waterways?
Yes, you often need permits, so check municipal guidelines for permit zones, launch restrictions, seasonal closures, and commercial regulations before you go, and grab ice hazard maps to spot thin spots. Call the parks or water agency, ask about event licenses if you plan a group or demo, carry flotation, a leash, cold‑water gear, and a VHF or phone in a dry bag, and pick entry points with clear access and escape options.
What Do I Do if My Paddle or Phone Falls Into Freezing Water?
You act fast: stop, brace the boat, avoid cold shock by keeping your head above water, then recover gear. Use phone floaters or waterproof pouches and thermal gloves to grab phones, toss a dry bag or tether for paddles, and if a paddle’s ruined, replace paddle once you’re safe. Check for hypothermia signs, warm up immediately, and practice quick recovery drills so you’re ready, confident, and prepared next time.
Can I Bring My Dog on a Winter Paddle, and What Precautions Are Needed?
Yes, you can bring your dog, but you’ll need dog lifejackets, thermal paw wear, and an exit strategy before you launch, and you’ll watch for hypothermia signs like shivering, lethargy, or stumbling. Practice cold water acclimation in short sessions, keep leash safety loose but ready, carry canine first aid gear, plan quick shore exits, and stop early if your dog slows, gets cold, or shows odd behavior, you’ll both stay safer and freer.


